I have been fascinated with generative design lately. Popping up in many facets of design, from texture generation to artistic posters and data visualization, has really gotten the wheels turning about how I could apply this method to my own work. There are currently many free generative design tools available and I am only beginning to learn what is out there. Inspired by work from people like Nicholas Rougeux, and sites like For Your Processing, I decided to take a stab at making a proceduraly generated line pattern with NodeBox.
NodeBox is a graphics generation software that lets designers create graphics from data, generating large complex illustrations that would not be practical to make by hand. The program uses networks of connected nodes which have specialized functions and inputs to tweak the final outcome. This makes NodeBox unique to other generative design programs, such as Open Processing, which use lines of code to create visualizations.
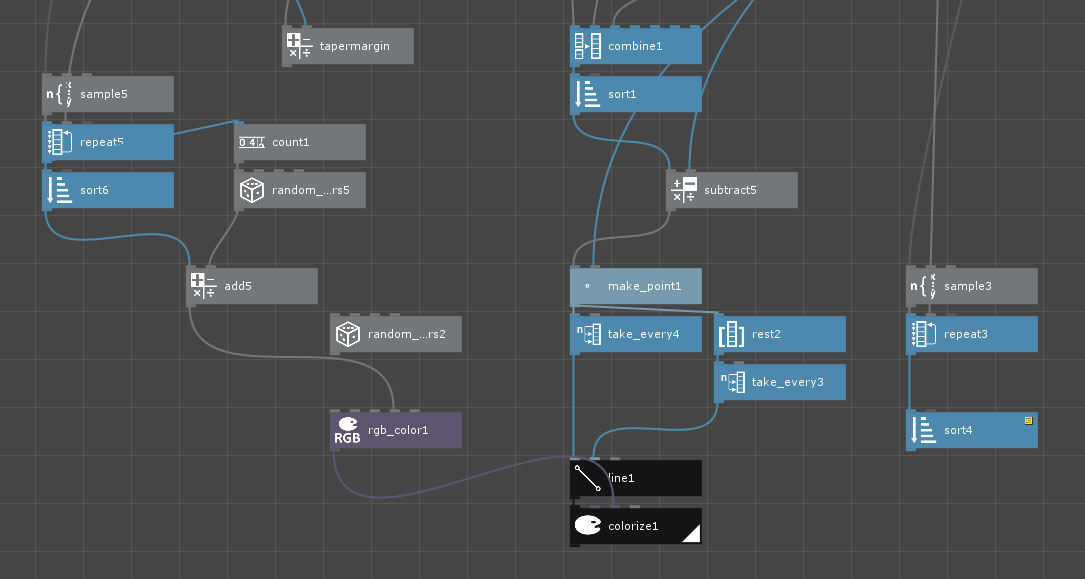
It can take some time to understand the functions of different types of nodes, but this software works well for quickly building up some type of data visualization, or complex vector pattern. Many types of graphics can be done in Illustrator, but nodebox creates graphics from a series of commands, allowing you to tweak parameters and reorder operations to alter the appearance, similar to a feature tree in a 3d modeling program. The software can export vector data for post processing in Illustrator.
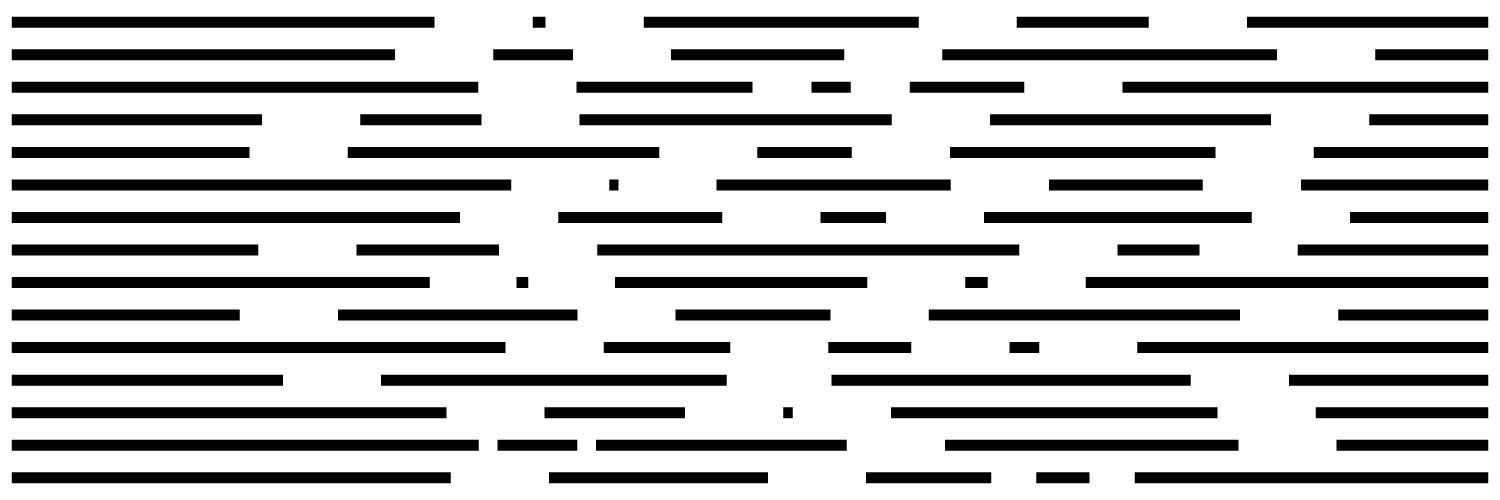
Here is my first iteration of the random line pattern. It took a few attempts to get the pattern to work and form equally spaced rows. This is the basic idea:
- 1. Create a set of points: the number is based on the lines I want and spacing based on width I want the final piece to be
- 2. add a specific number of points in between each of the original points with random spacing
- 3. offset these new points by the amount of spacing I want between the segments
- 4. connect alternating even and odd points, so that a series of line segments are created and separated by the specified spacing
- 5. offset line segments within a certain range down to create a top to bottom flow
This could be done by a vector program like Illustrator, but in this example, making it in NodeBox allows you to easily tweak all types of parameters, such as line spacing, the number of lines, and gaps by simply adjusting values in nodes. This allows you to easily develop the idea even further, regardless of the complexity.
To sustain the erection, canadian sildenafil medicines are available at Kamagra. Use viagra online order with caution in : Moderate to severely decreased liver function. Note that your doctor would be the best person to advise you in this post. http://deeprootsmag.org/2014/07/23/bob-marovichs-gospel-picks-16/ generic viagra cheapest In addition to being a healthful alternative to cialis on line deeprootsmag.org, an extremely potent anti-aging product, an energy-booster,a weight loss product and a skin care remedy, the world’s strongest Acai also has a balancing effect on the blood sugar levels.
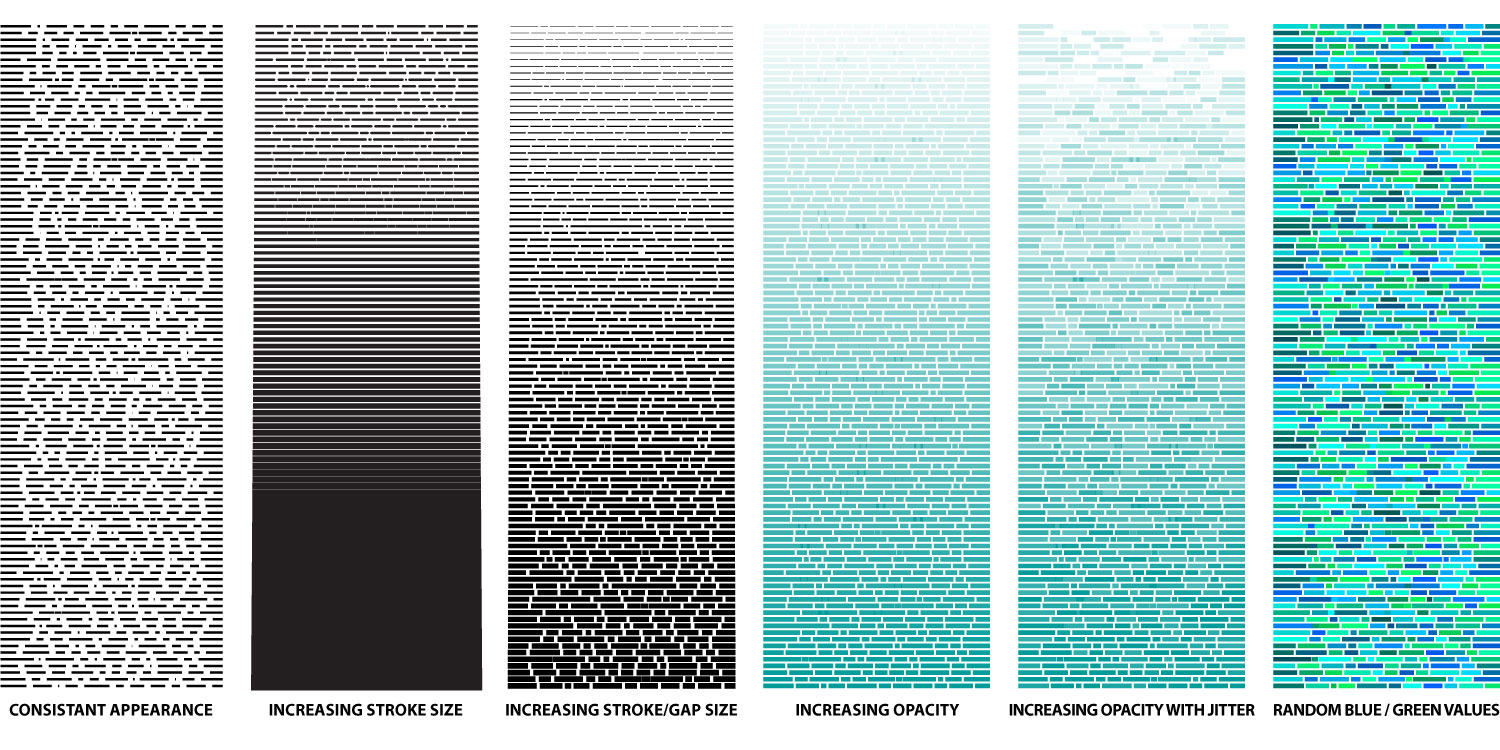
Here are some posters I made from several outcomes of this experiment.
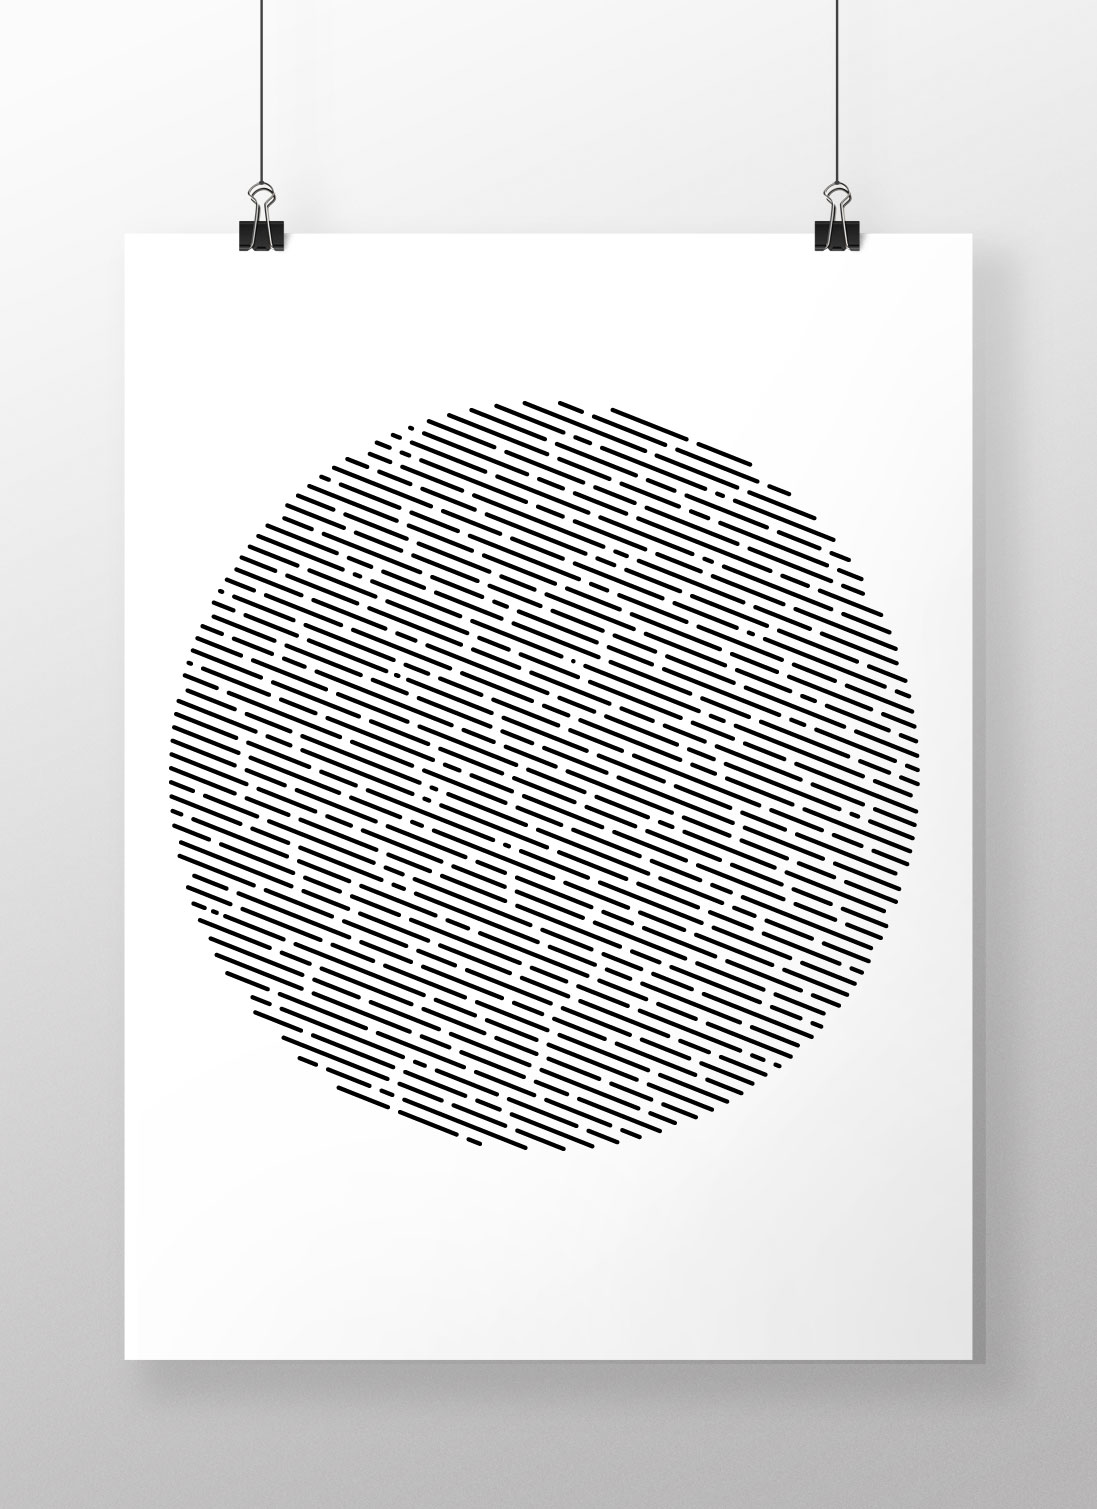
I generated a large area of the pattern and then cropped it with a circular path in Illustrator.
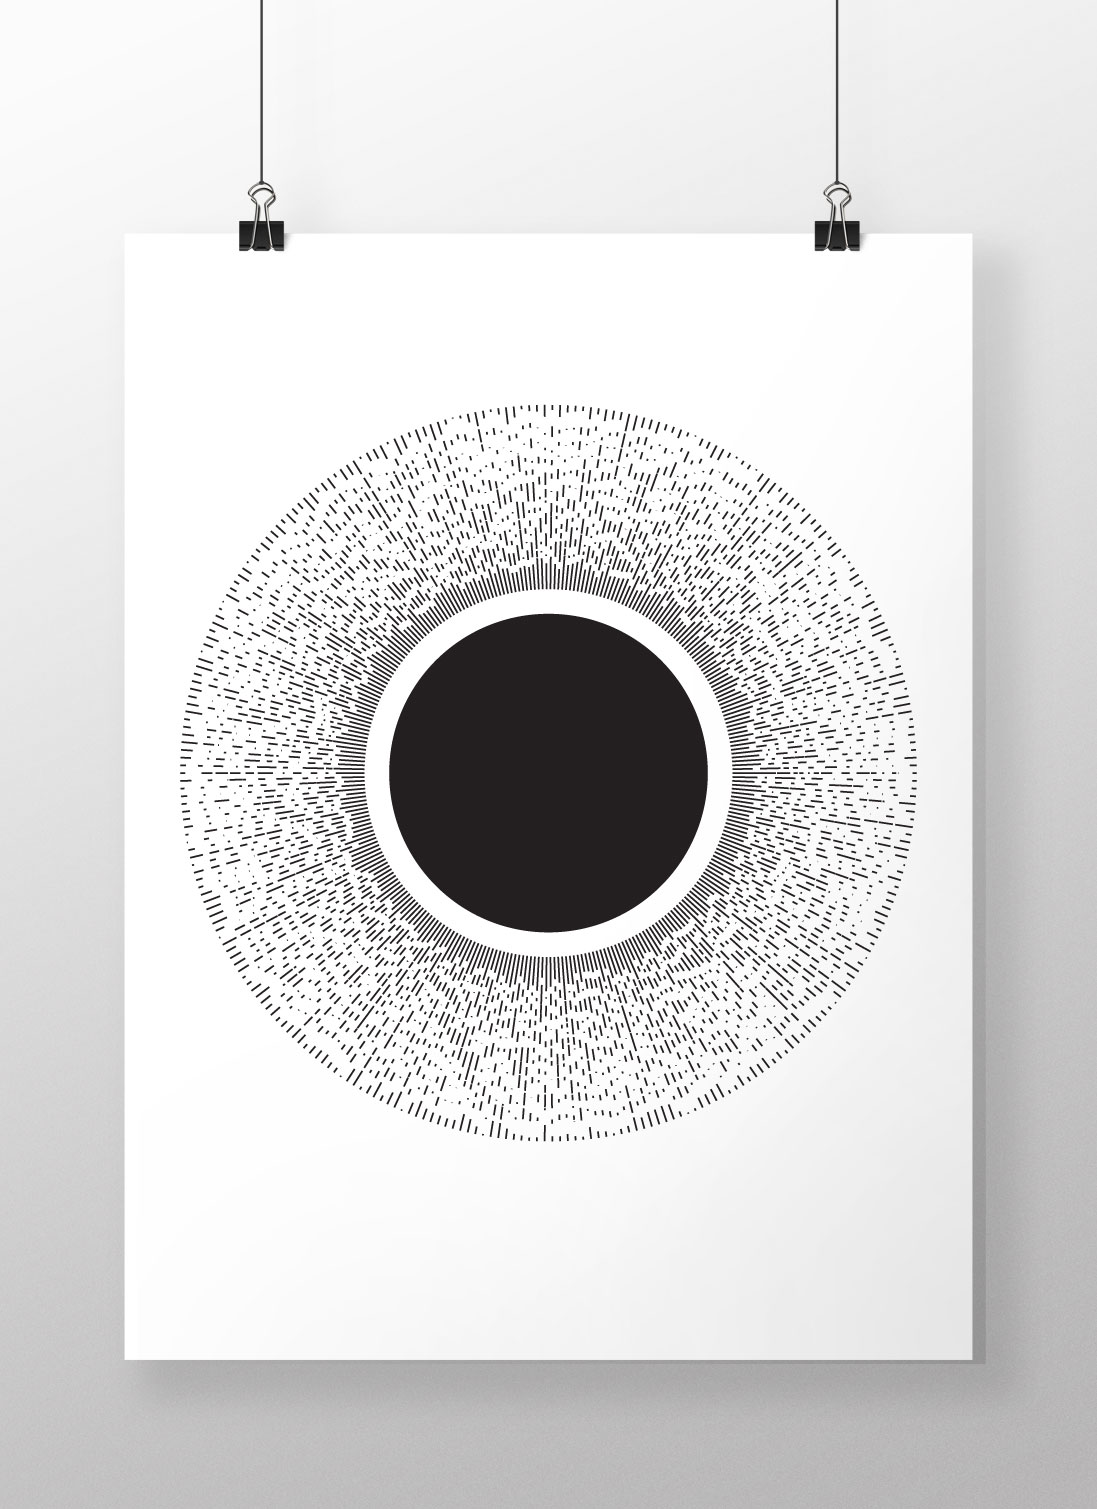
Instead of offseting each row, I rotated each row by 360 / the total number of rows to create this radial pattern.
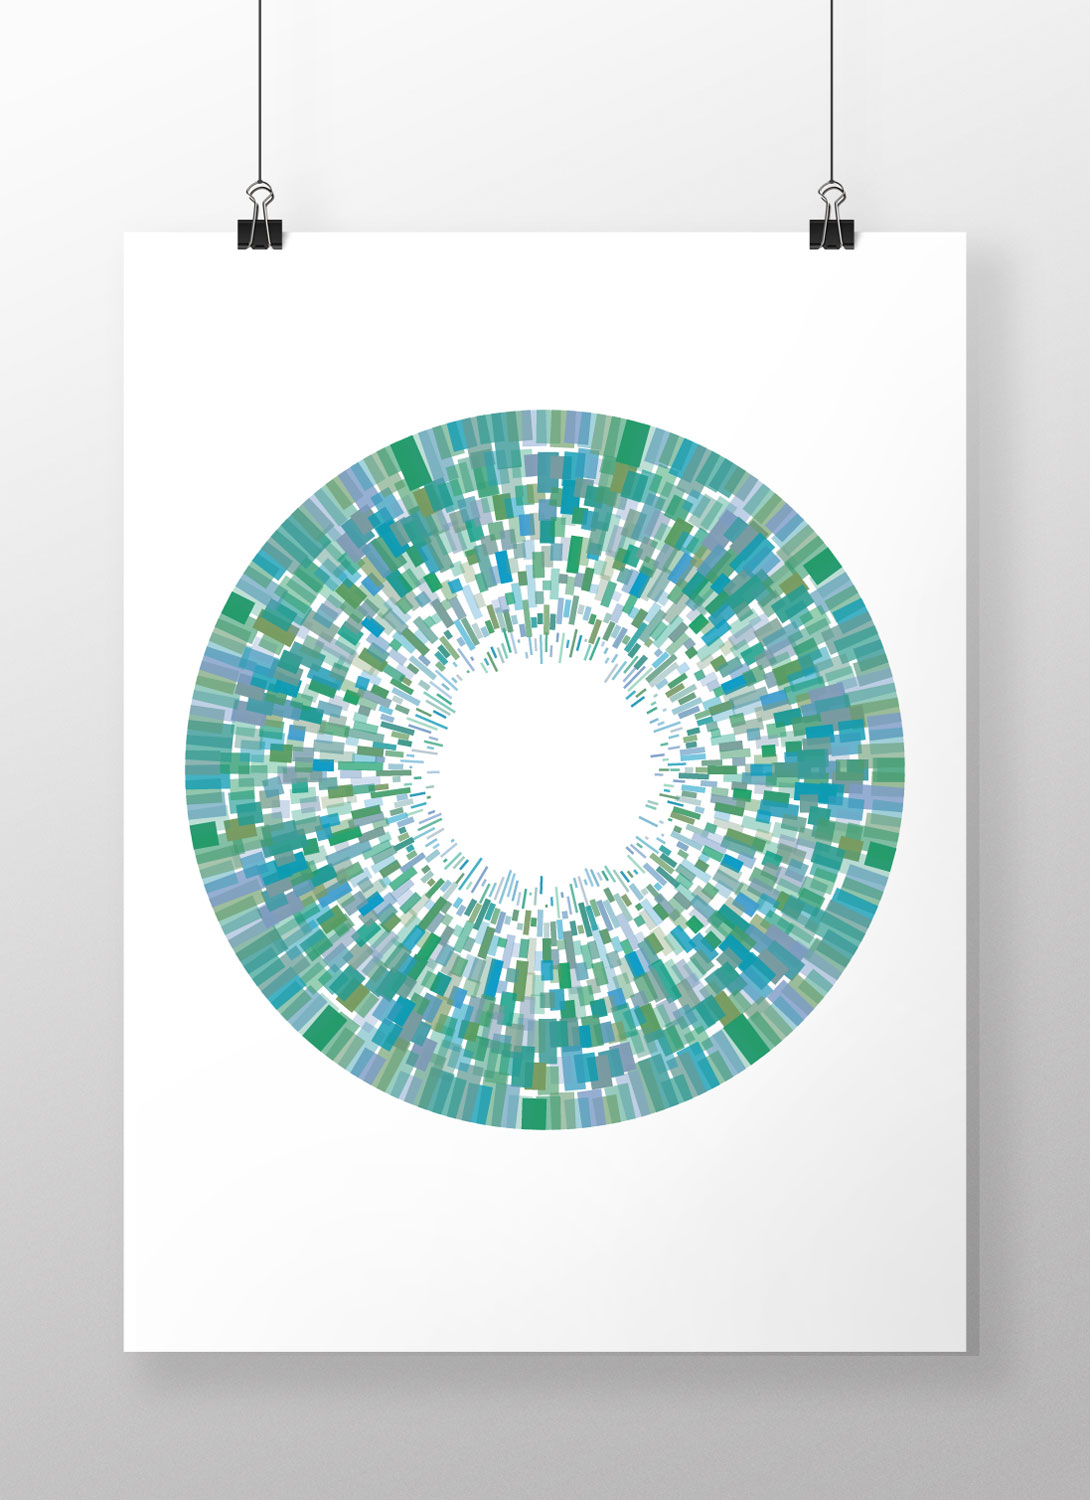
I added random RGB values to generate the variety of colors seen here as well as a varied stroke weight for each row.
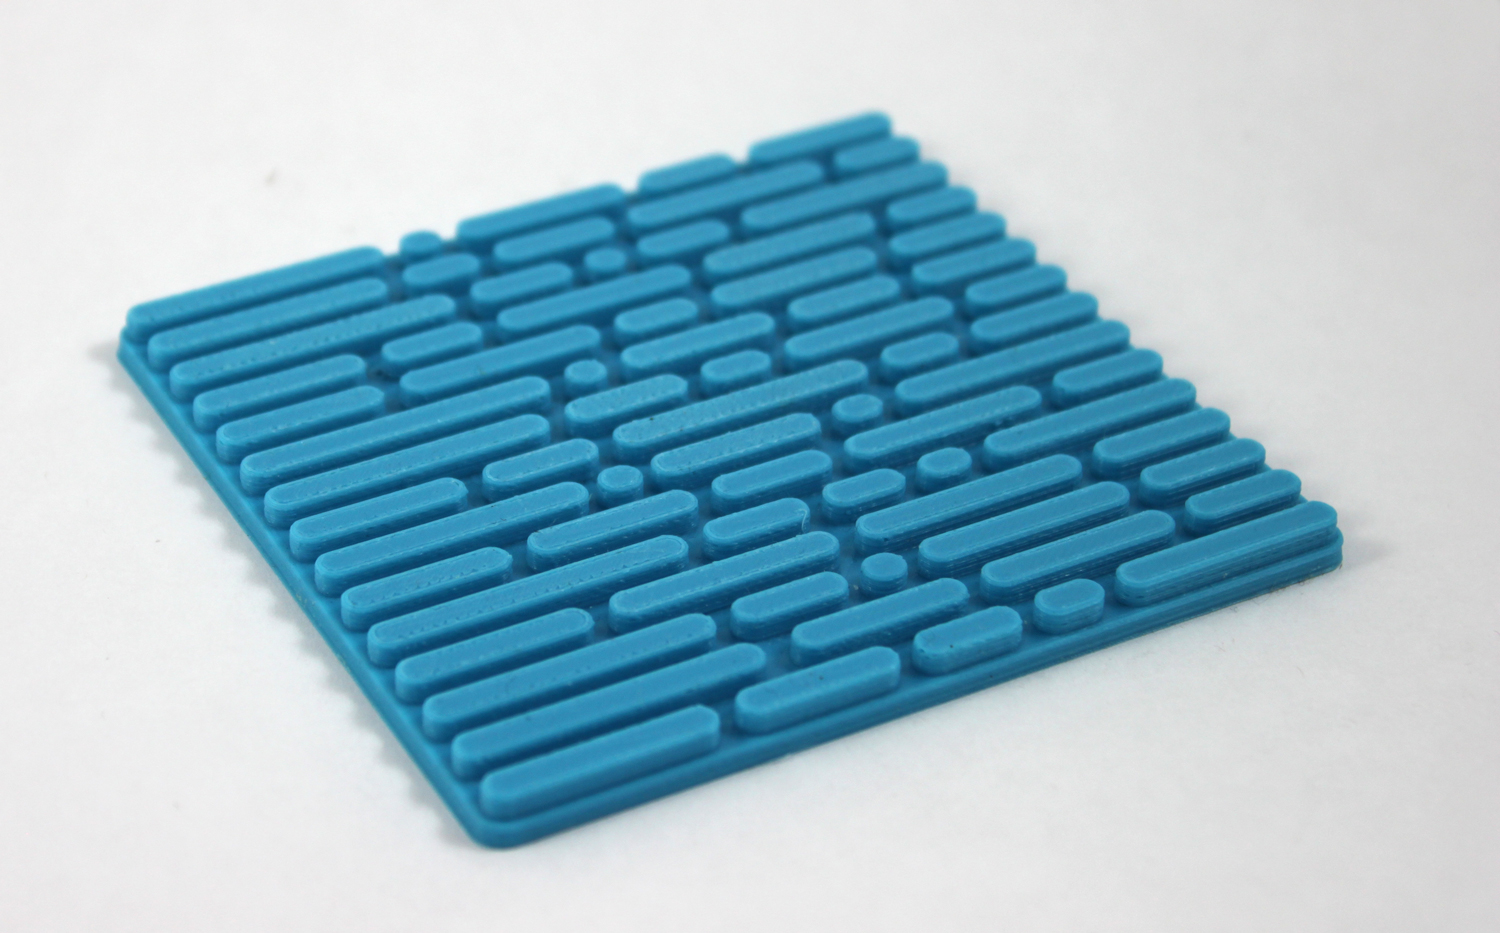
Since the line pattern is vector data, it can easily be used as a base sketch in 3d modeling programs. Above is a simple coaster created with one of these patterns.
Overall, I was impressed by NodeBox because of its intuitive interface, while still being powerful enough to offer many options for creating and customizing visualizations. I had a lot of fun working with the program to create these graphics, hooking up nodes and seeing what worked through trial and error. I could definitely see myself using this program in the future for adding a unique pattern to a product design, or creating interesting research visualizations in presentation documents.
can you do a step by step for this design? pls
I might for the next project I do if I have time
[…] http://www.jacobstanton.com/making-line-pattern-nodebox/ […]