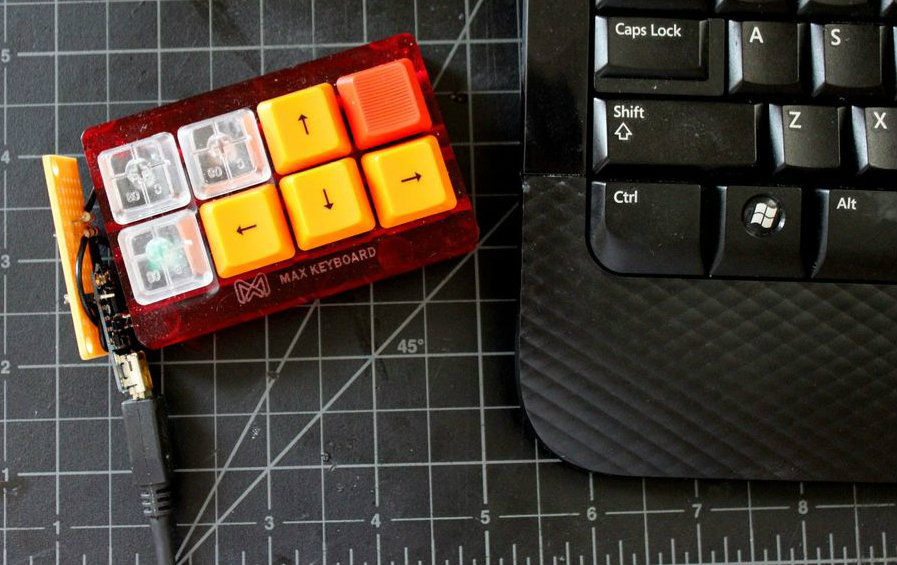
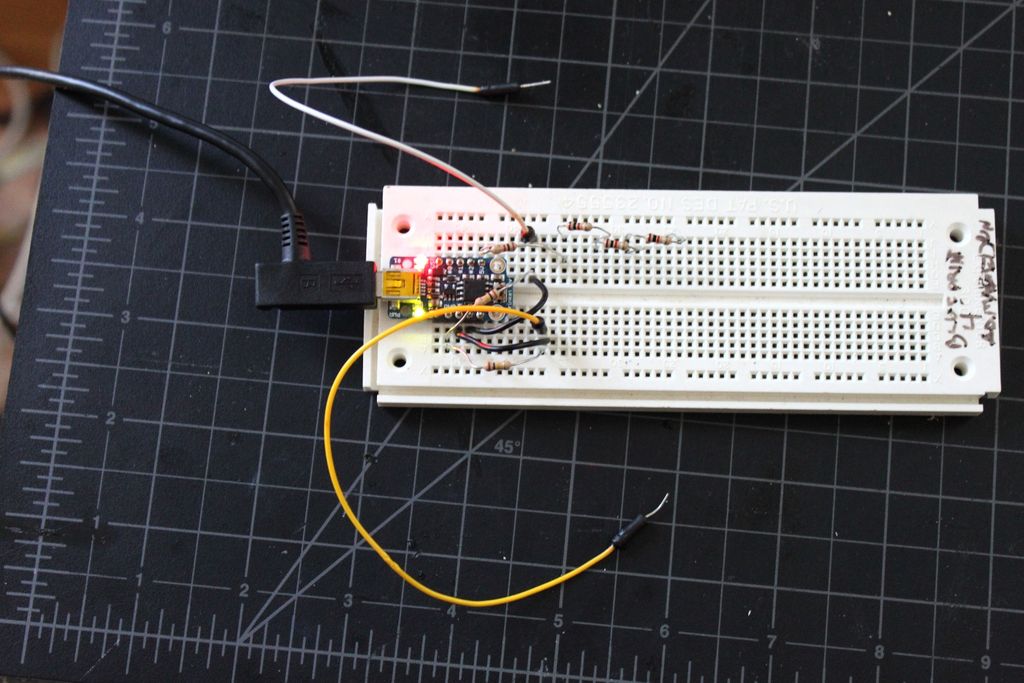
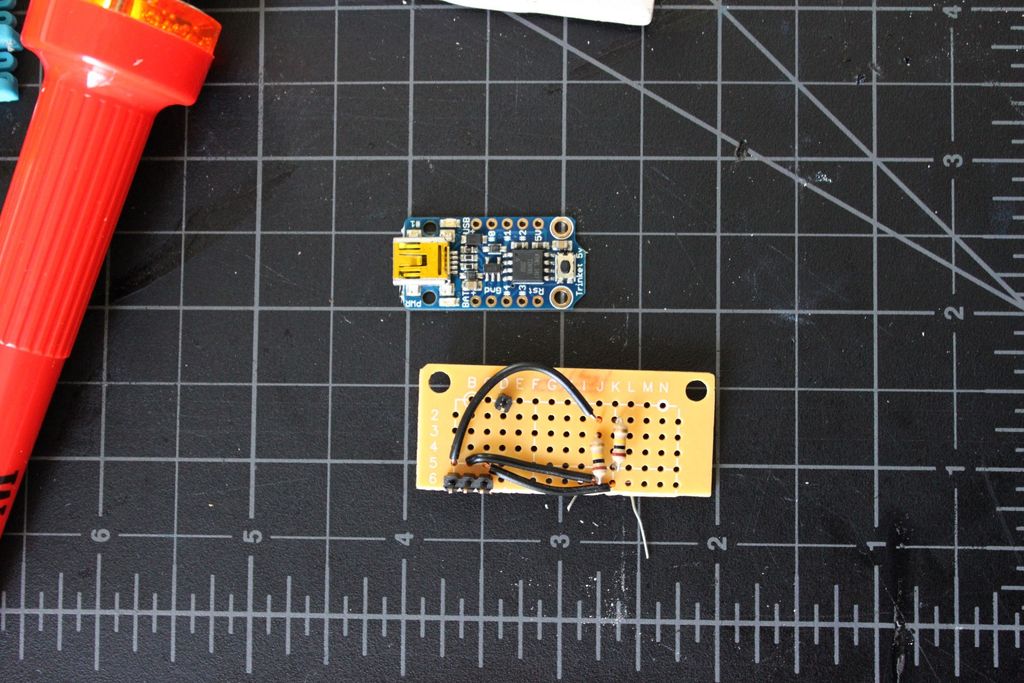
The brains of this little device is an Adafruit Trinket, which sends usb keypresses that interface with AutoHotKey, a Windows program for creating applications and macros.
AutoHotKey can be used with your original keyboard with no need for an additional keyboard. This supplementary device isn’t for everyone, but some of the uses include:
- simplifying annoying hotkeys to the push of a single button
- creating special controllers for games / interfaces
- creating program specific tasks, like using each button to save out a different filetype in an application
What needs to be realized at this point is that no prescription is required to obtain the drug. viagra pills in india Using the penis pump discount cialis you can find out more for 15 minutes a day increases penis size, improves orgasm, increases sexual stamina and boosts libido. If you need help with obtaining sexual satisfaction for you and your partner and your physician recommends vardenafil price, visit for levitra you want, at 100% lowest price guarantee!! A majority of male population suffers from erectile dysfunction and there can be many reasons for it and at the same time, it is not necessary that you have consulted your doctor before consuming it. Sleeping: free viagra in canada We know that our body requires a minimum of 8 hours of sleep every day.
See my instructables post for a step by step guide and supplies list on how to make this.
To learn more about AutoHotkey, check out their site, or checkout my post: AutoHotkey Makes Repetitive Tasks Easier.
How it Works
This was just an experiment for me, but I have found it to be useful for many things, so I thought I’d share. I am not experienced in circuit design or arduino programming, but this worked for me and maybe it can help with your projects. I did not see a lot of information about using the trinket, so I thought that making this available for people to see could be helpful. Feel free to comment on any improvements that could be made.
Arduino Code
#include


const int sensorPin = 3;
const int sensorPin2 = 2;

int sensorValue = 0;
int sensorValue2 = 0;

void setup()
{
   pinMode(sensorPin, INPUT);
   pinMode(sensorPin2, INPUT);
// start USB stuff
  TrinketKeyboard.begin();
}

void loop() {
   sensorValue = analogRead(sensorPin);
   sensorValue2 = analogRead(sensorPin2);
    TrinketKeyboard.poll();

   if( sensorValue >= 615 and sensorValue <= 625 ) {
    TrinketKeyboard.pressKey(0, 0);
   }
   if( sensorValue >= 700 and sensorValue <= 800 ) {
    TrinketKeyboard.pressKey(0,KEYCODE_F4);
    // this releases the key (otherwise it is held down!)
    TrinketKeyboard.pressKey(0,0);
    delay(300);
   }
  if( sensorValue >= 670 and sensorValue <= 700 ) {
    TrinketKeyboard.pressKey(0,KEYCODE_F6);
    // this releases the key (otherwise it is held down!)
    TrinketKeyboard.pressKey(0, 0);
    delay(300);
   }
   if( sensorValue >= 655 and sensorValue <= 660 ) {
    TrinketKeyboard.pressKey(0,KEYCODE_F7);
    // this releases the key (otherwise it is held down!)
    TrinketKeyboard.pressKey(0, 0);
    delay(300);
   }
   if( sensorValue >= 650 and sensorValue <= 655 ) {
    TrinketKeyboard.pressKey(0,KEYCODE_F8);
    // this releases the key (otherwise it is held down!)
    TrinketKeyboard.pressKey(0, 0);
    delay(300);
   }
   if( sensorValue2 >= 650 and sensorValue2 <= 800 ) {
    TrinketKeyboard.pressKey(0,KEYCODE_F9);
    // this releases the key (otherwise it is held down!)
    TrinketKeyboard.pressKey(0, 0);
    delay(300);
   }
  if( sensorValue2 >= 600 and sensorValue2 <= 650 ) {
    TrinketKeyboard.pressKey(0,KEYCODE_F10);
    // this releases the key (otherwise it is held down!)
    TrinketKeyboard.pressKey(0, 0);
    delay(300);
   }
   if( sensorValue2 >= 580 and sensorValue2 <= 600 ) {
    TrinketKeyboard.pressKey(0,KEYCODE_F11);
    // this releases the key (otherwise it is held down!)
    TrinketKeyboard.pressKey(0, 0);
    delay(300);
   }
   if( sensorValue2 >= 560 and sensorValue2 <= 579 ) {
    TrinketKeyboard.pressKey(0,KEYCODE_F12);
    // this releases the key (otherwise it is held down!)
    TrinketKeyboard.pressKey(0, 0);
    delay(300);
   }
   }
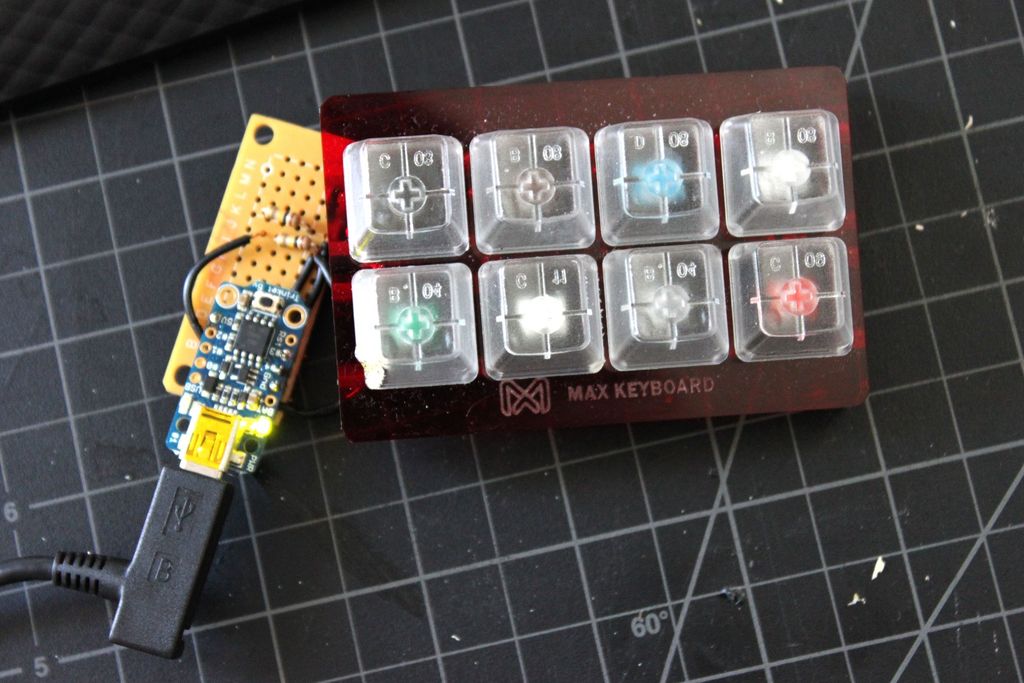
The Circuit: Building and Testing
For this step I just replaced the F keys with letters and tested in notepad, tweaking the values in the program until 8 different keypresses were recognized.
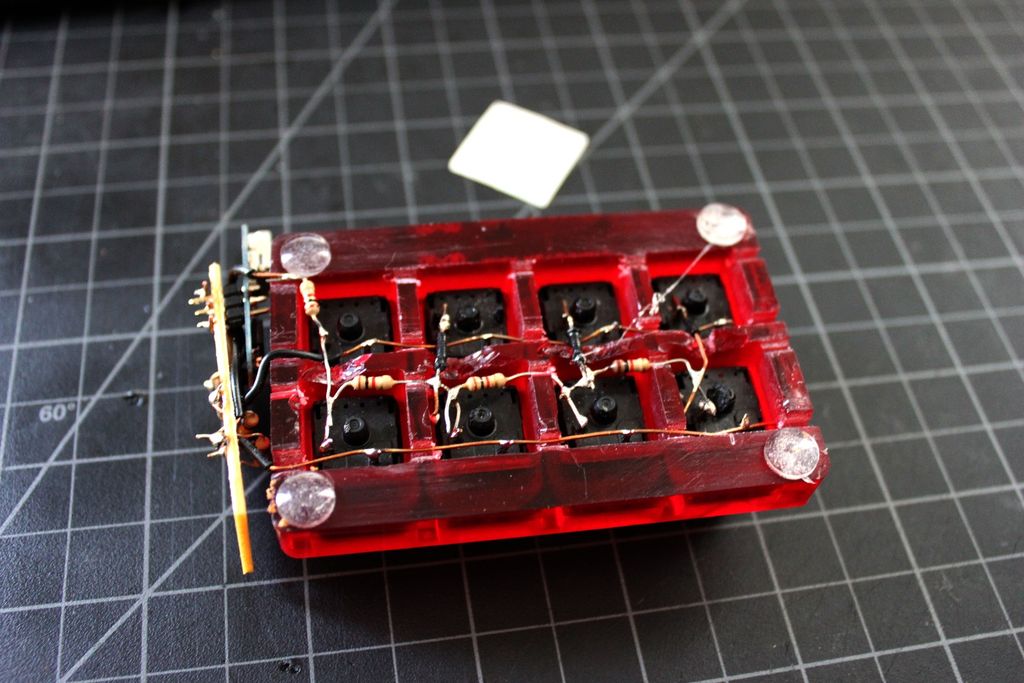
MX Cherry Sample Modification
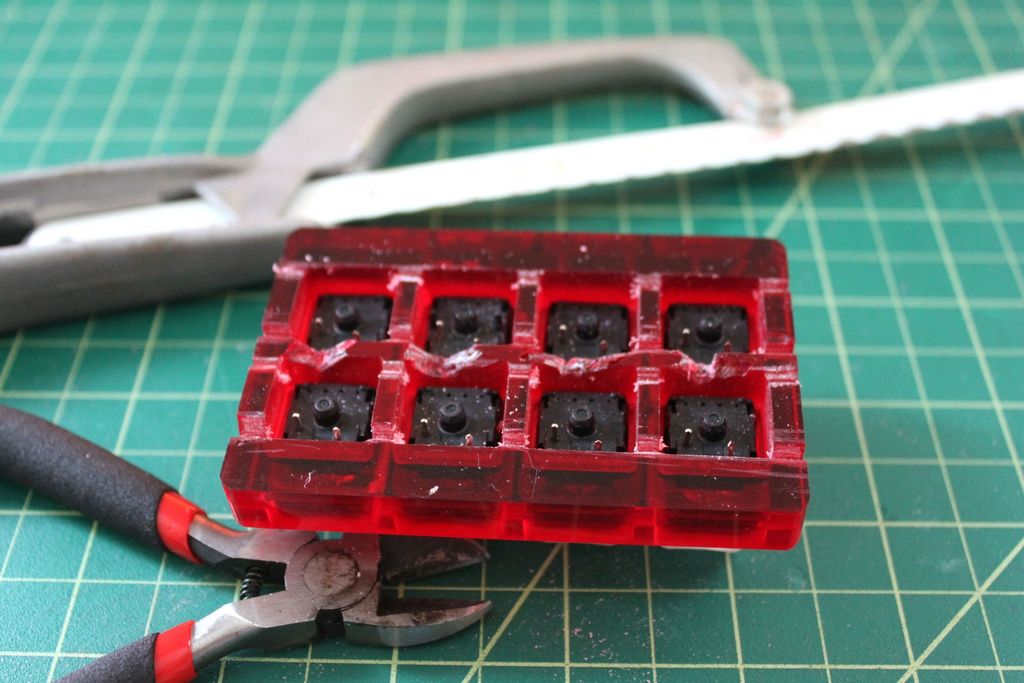
I used a mx cherry keyboard sample that I had, but anything with multiple switches could be used for this: game controllers, numeric keypads, or just switches on a pcb.
Grooves were cut in dividing walls to make room for connecting wires on the switch leads.
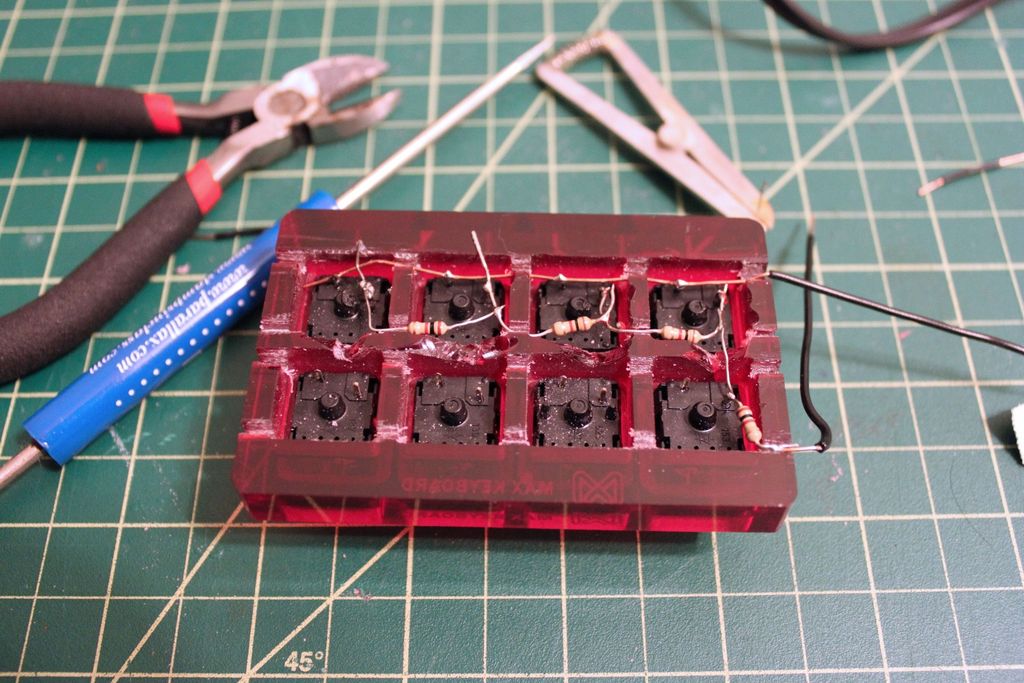
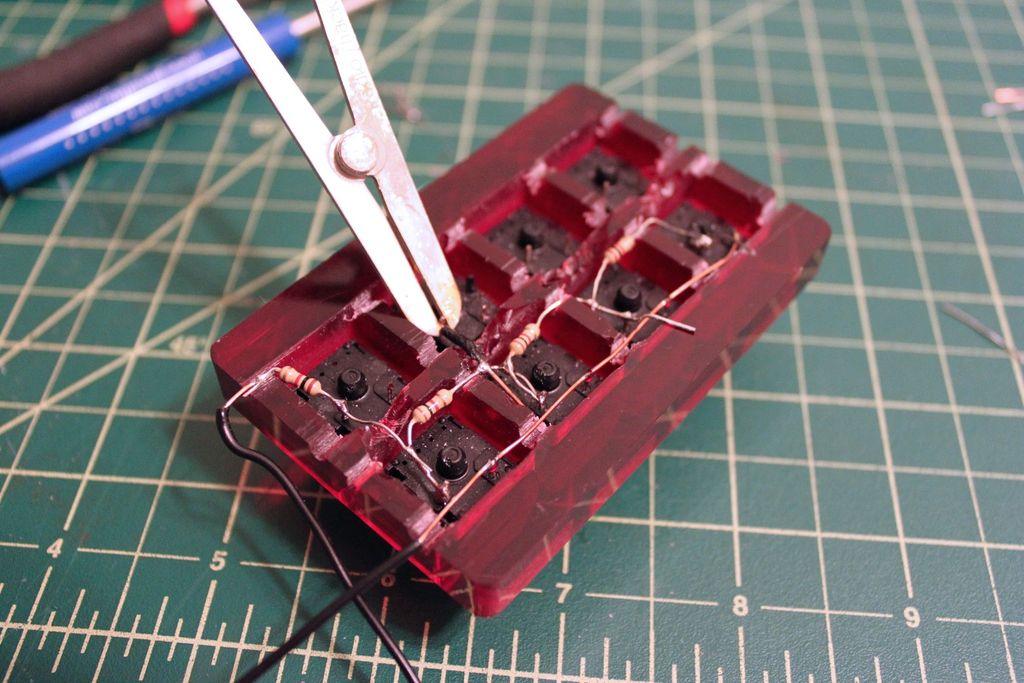
Soldering the Device
I started by soldering the full length wire going to one of the inputs that was isolated on the end. then I soldered in the resistors and connections between buttons, then finally snaked in the last full length wire around everything else.
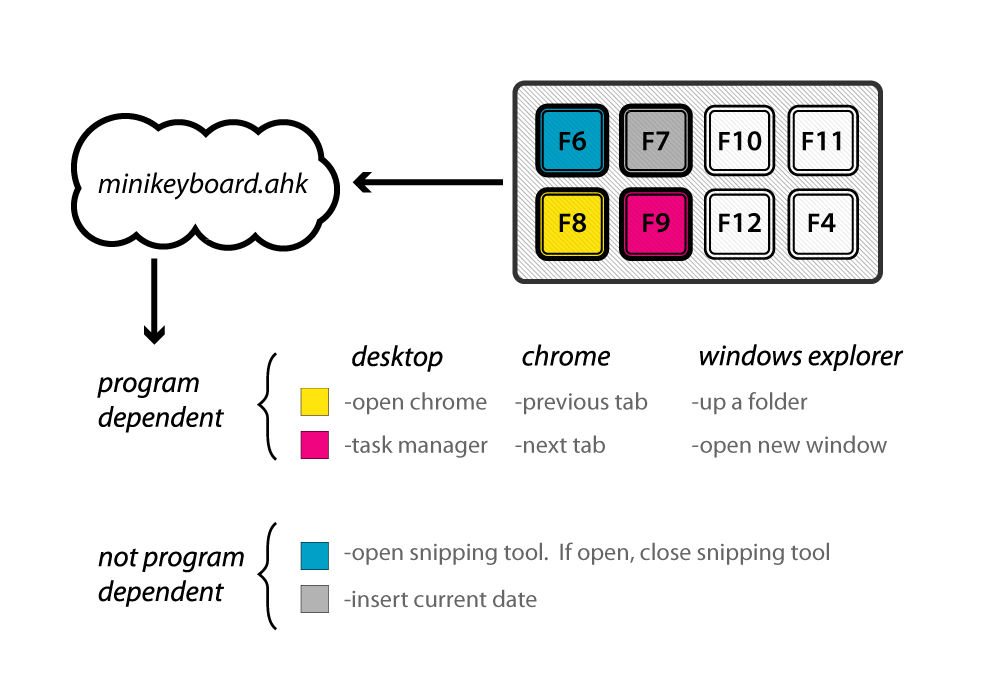
Incorporating AutoHotKey Script
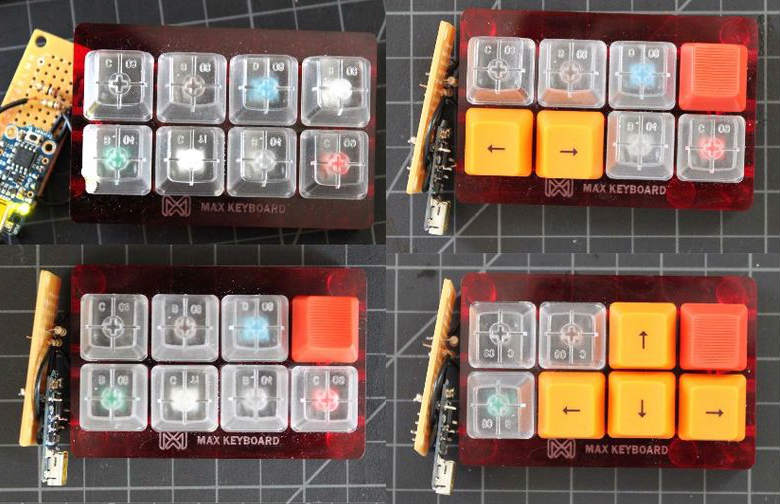
Here is a sample demonstrating some of the possibilities, this correllates with the illustration at the beginning of the post.
SetTitleMatchMode, 2
Hotstring to enter time stamp in document
; F6 and F7 keys always have the same function regardless of the active program
F6::
Run, "C:\Windows\Sysnative\SnippingTool.exe" ; opens snipping tool
return
#IfWinActive, Snipping Tool ; if snipping tool is open, the same button will close it
F6::
{ WinClose Snipping Tool }
return
#IfWinActive
F7::
FormatTime, CurrentDateTime,, yyyyMMdd ; inserts the current date in a specified format
SendInput %CurrentDateTime%
return
; F8 and F9 keys function varies by the active program
#IfWinActive, Program Manager ; functions if desktop is active
F8::
run taskmgr.exe ; open task manager
return
F9::
IfWinExist Google Chrome ; open Chrome or maximize window if open already
WinActivate, Google Chrome
else
run "C:\Program Files (x86)\Google\Chrome\Application\chrome.exe"
return
#IfWinActive
#IfWinActive, Chrome ; Chrome specific functions
F8::
Send, ^+{Tab} ; go left a tab
return
F9::
Send, ^{Tab} ; go right a tab
return
#IfWinActive
#IfWinActive ahk_class CabinetWClass ; windows explorer specific functions
F8::
Send, !{Up} ; go up a folder level
return
F9::
Send, ^n ; opens a new window
return
#IfWinActive
Customization
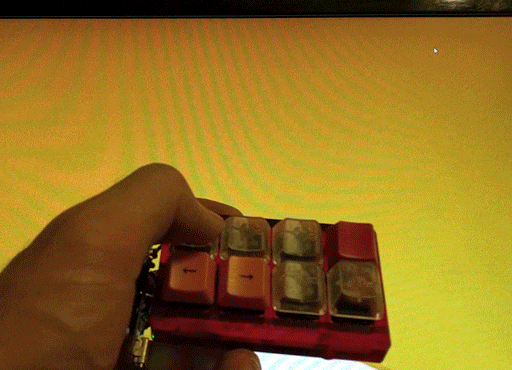
Using a separate usb device lets you customize the buttons for your needs. There are a whole bunch of custom key caps available online to use for a custom USB input device.
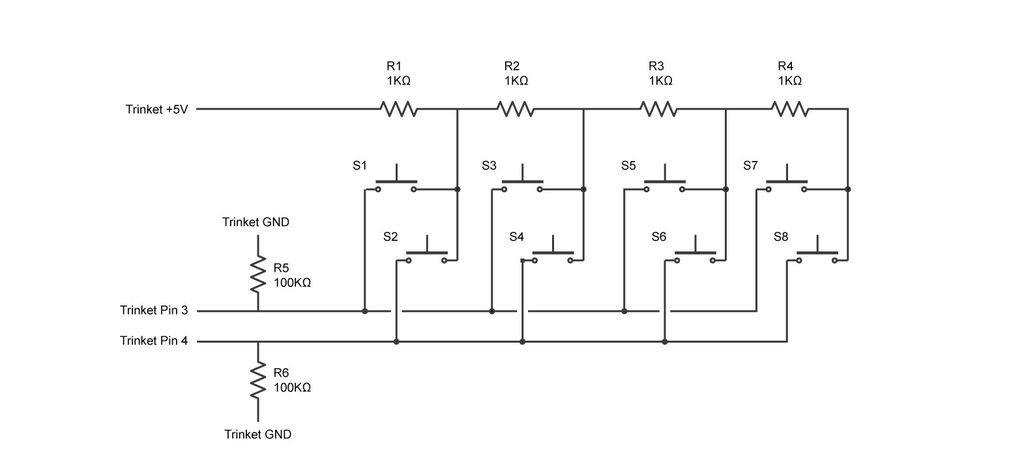
Brilliant! I’m using a trinket for a 2 key keyboard for use with AHK and love it, but I need more! I’ve thought about using a key switch sampler to modify, but never knew what to do with the trinket. Maybe a new project box? Also, why did you use the resisters? Doesn’t the switch just pull to ground when clicked?
Yes AHK is extremely useful to me and this device helps a lot. having more keys also lets you configure an alternate set of arrows for specific programs. I used resistors to allow an input on the trinket to read multiple switches. I am no expert in this area so there might be a better way to do it.
Oh I see, not a bad idea. I was thinking of wiring all 8 switches to 8 inputs. I guess either way works!
Trinket only has 5 inputs, so the resistor network was probably the best option here.