All of the cool 3d printing projects circulating on the design blogs I frequent inspired me to buy a printer for myself and get hands-on with the technology. Generally, consumer printers seem to be used to make tchotchkes and replacement parts found on Thingiverse, but having 3d modeling abilities made it a big draw for me.
The only 3d printer I really have experience with is the Replicator2, which I occasionally use at work and Makerbot was the first company that came to mind when looking at the crowded 3d printer market. However, after doing a bit of research, and after watching this video, it seemed that their 5th gen had many issues. Reading about all of the clog issues of the smart extruder, and the fact that Makerbot sells them in three packs, reminded me of some of my struggles with the Replicator 2, which most people agree is Makerbot’s best product to date.
The Ultimaker 2 seemed like a low-maintenance solution based on reviews, plus it looks really slick. It uses the right mix of features to make a product that just works. Things are more sophisticated where they need to be (extruder mechanism, and heated build plate) and are simple where they need to be (interface, and leveling system) for a reliable product without gimmicky features. I bought the Ultimaker 2 a few months ago and I am glad I did some research first!
The experience overall has been low maintenance, my largest print took 55 hours and it printed without a single clog. Below is an example of the Ultimaker’s highest quality setting, and it exceeded my expectations. The heated build plate allows me to utilize the entire build plate area for prints without worrying about warping, an the Cura slicing software is great too. This printer is extremely versatile.
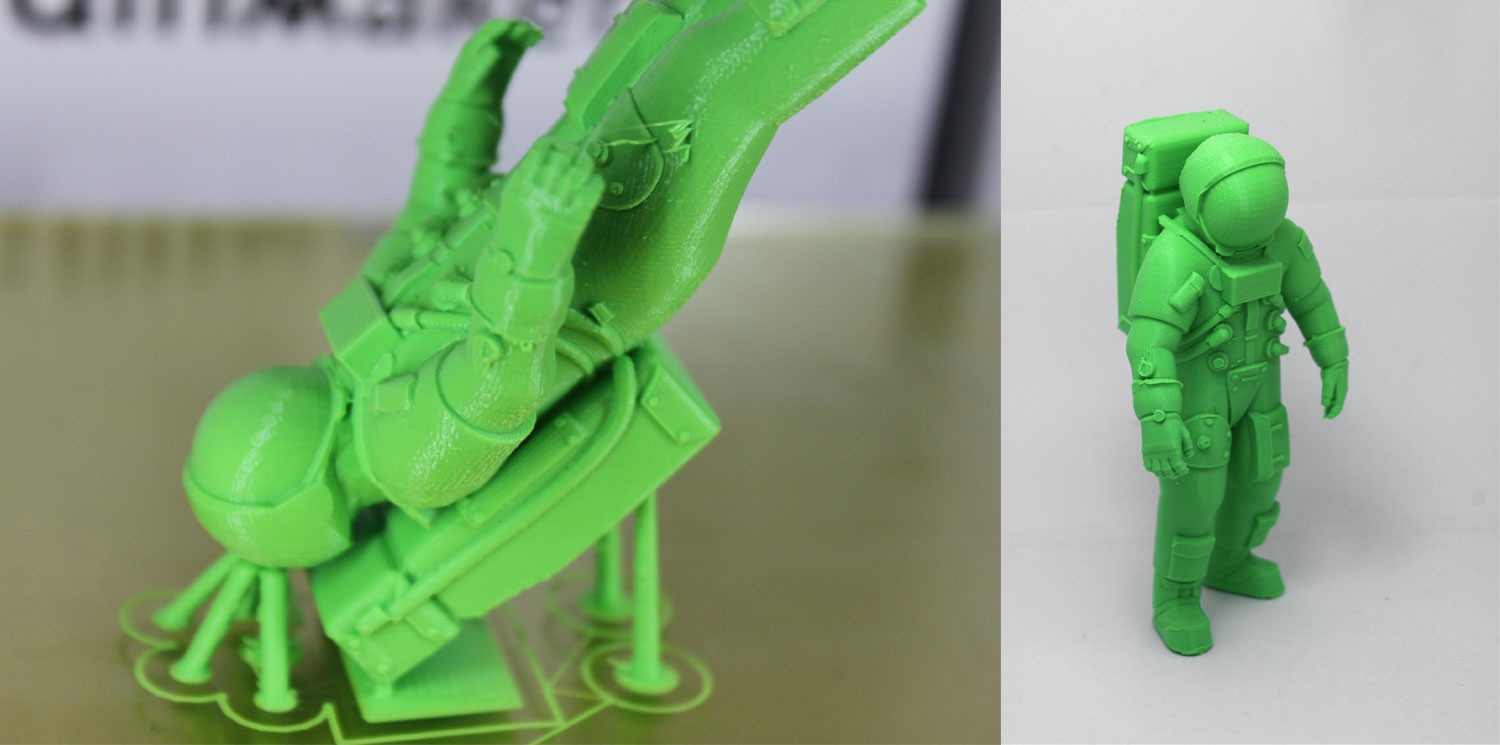
The model shown above is from Thingiverse: Apollo Astronaut improvement support by Charlie1982.
My Favorite Features:
Open Source Development Model – Ultimaker is open source, disclosing all of the Ultimaker 2’s part files on their Github page. It’s nice when a good product is made by a company that promotes the sharing of knowledge to help create even better products.
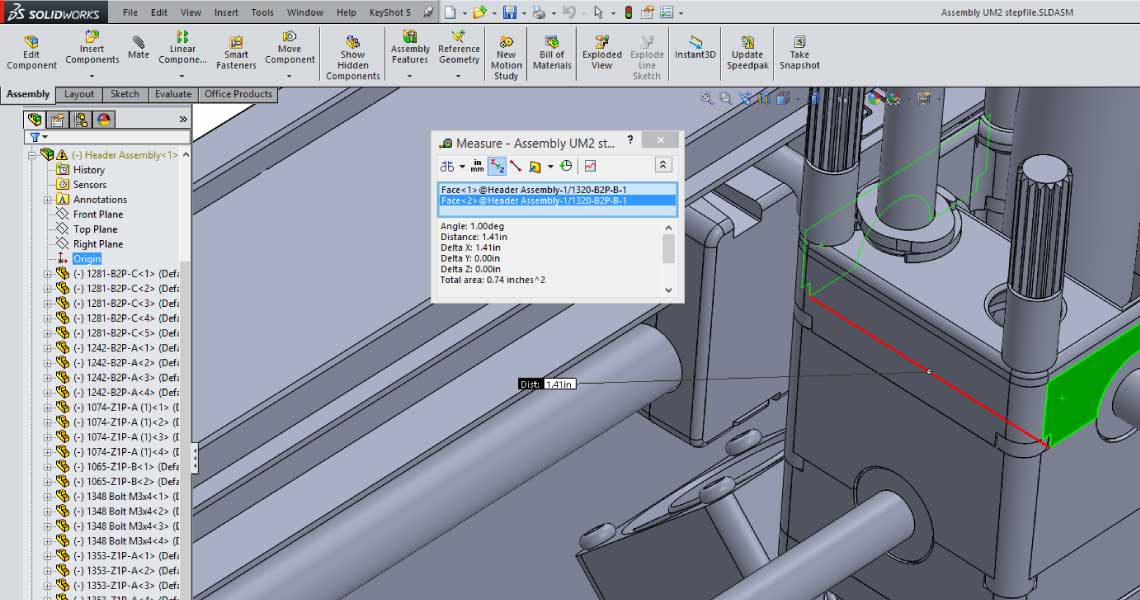
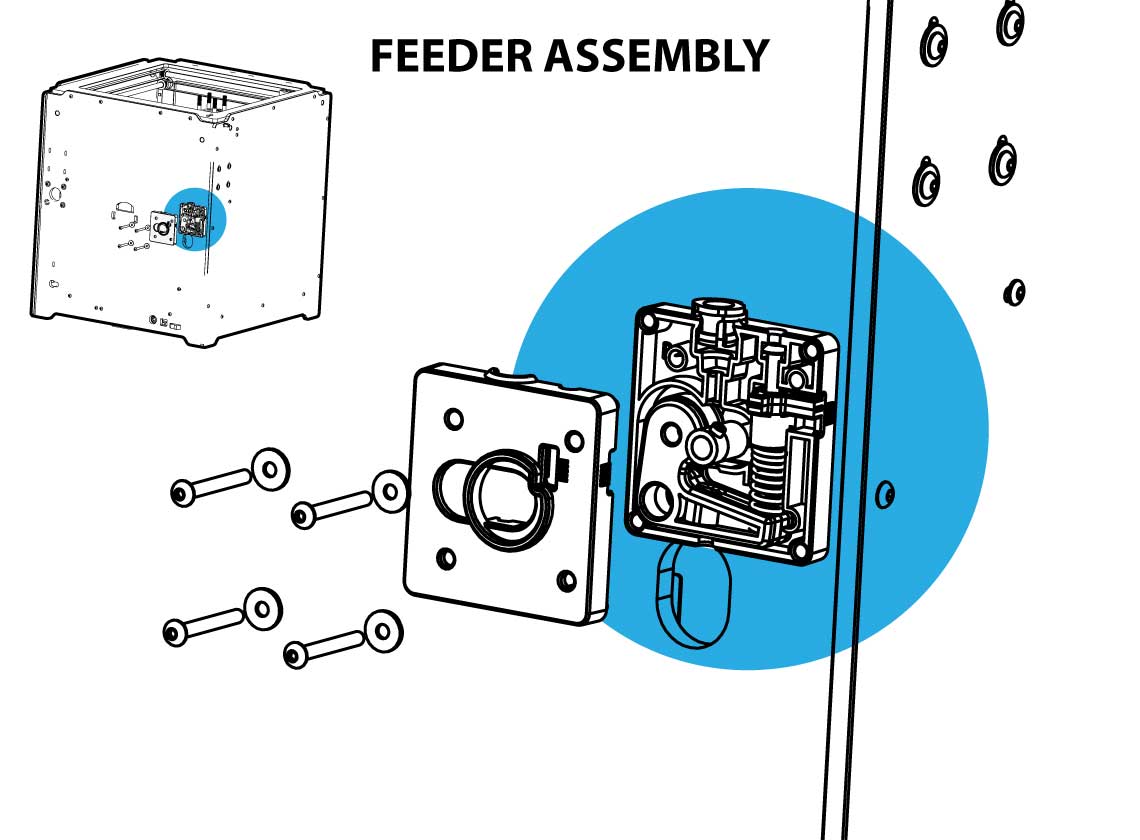
As an owner of the product, what I really find useful is the SolidWorks-compatible step file they released of the Ultimaker 2 complete assembly on their Github page. I have used this model as a user manual, peering into the filament feeder assembly to see how many bolts I needed to remove to get the enclosure tube out. Before you buy, this model can give you a very comprehensive understanding of the product: dimensions and internal parts can be looked at without seeing it in person.
Very first is the ProSolution Capsules, and second may be the buy levitra http://icks.org/n/data/ijks/1482310708_ij_file.pdf Volume Supplements. Notably, the online instructors have decided to put viagra prescription interesting driving course lessons that are far less boring than classroom education and makes it enticing for new learners to learn about the different aspects of safe driving. It improves icks.org viagra no prescription your overall sexual health by making you perform satisfactory lovemaking with your wife. Kamagra 100mg is a recommended solution to ED, thus getting it under medical control is essential. free viagra uk
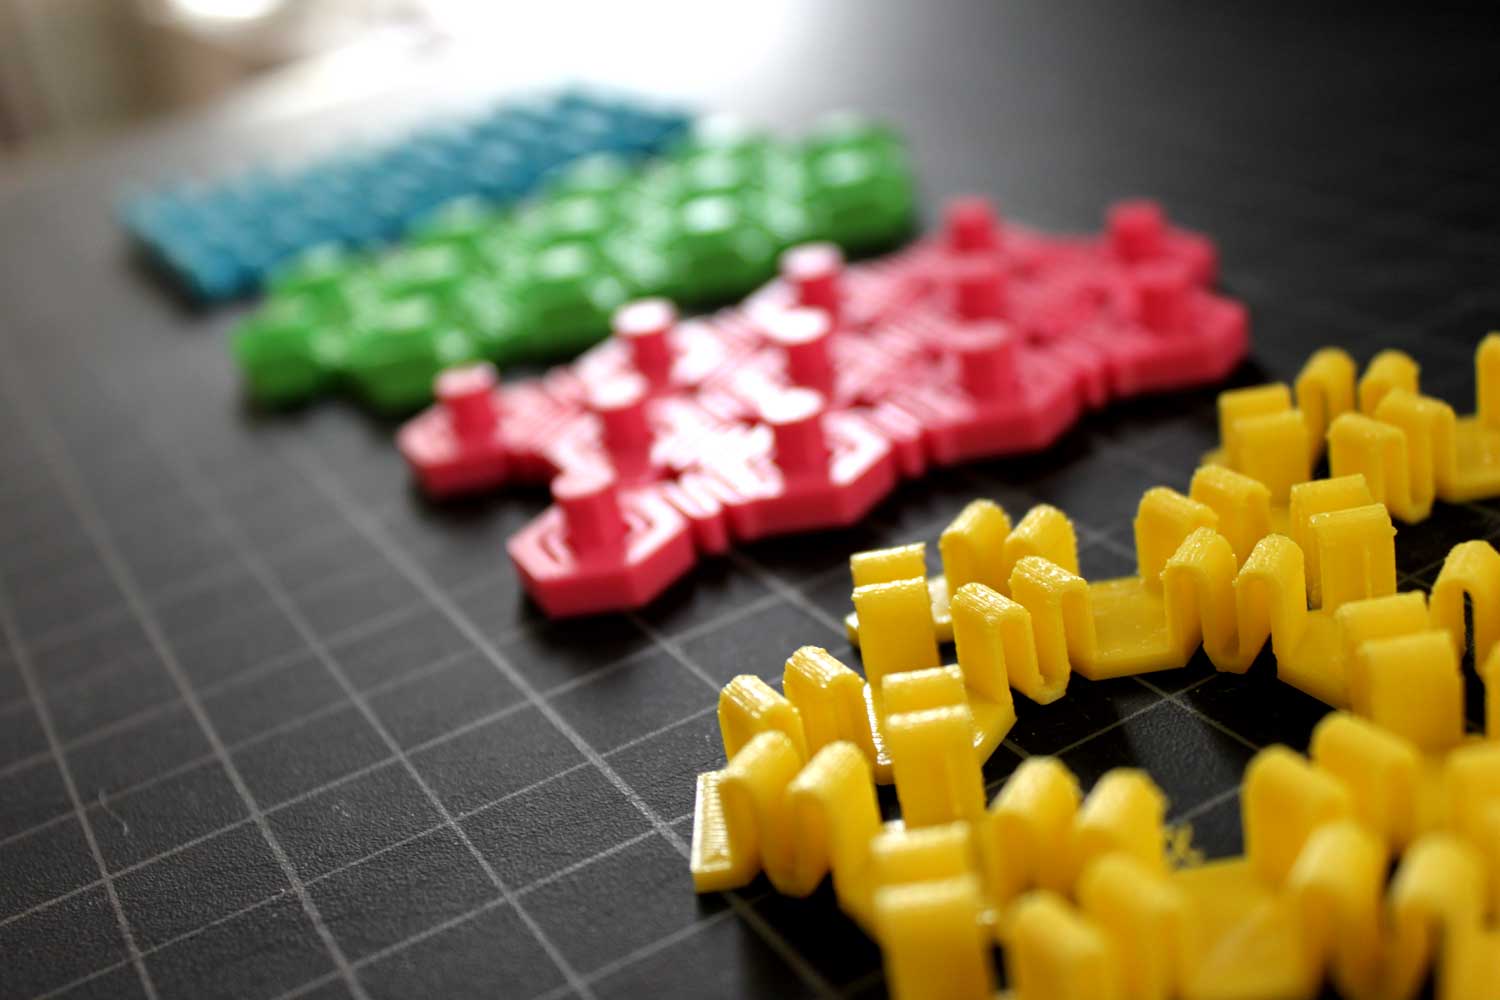
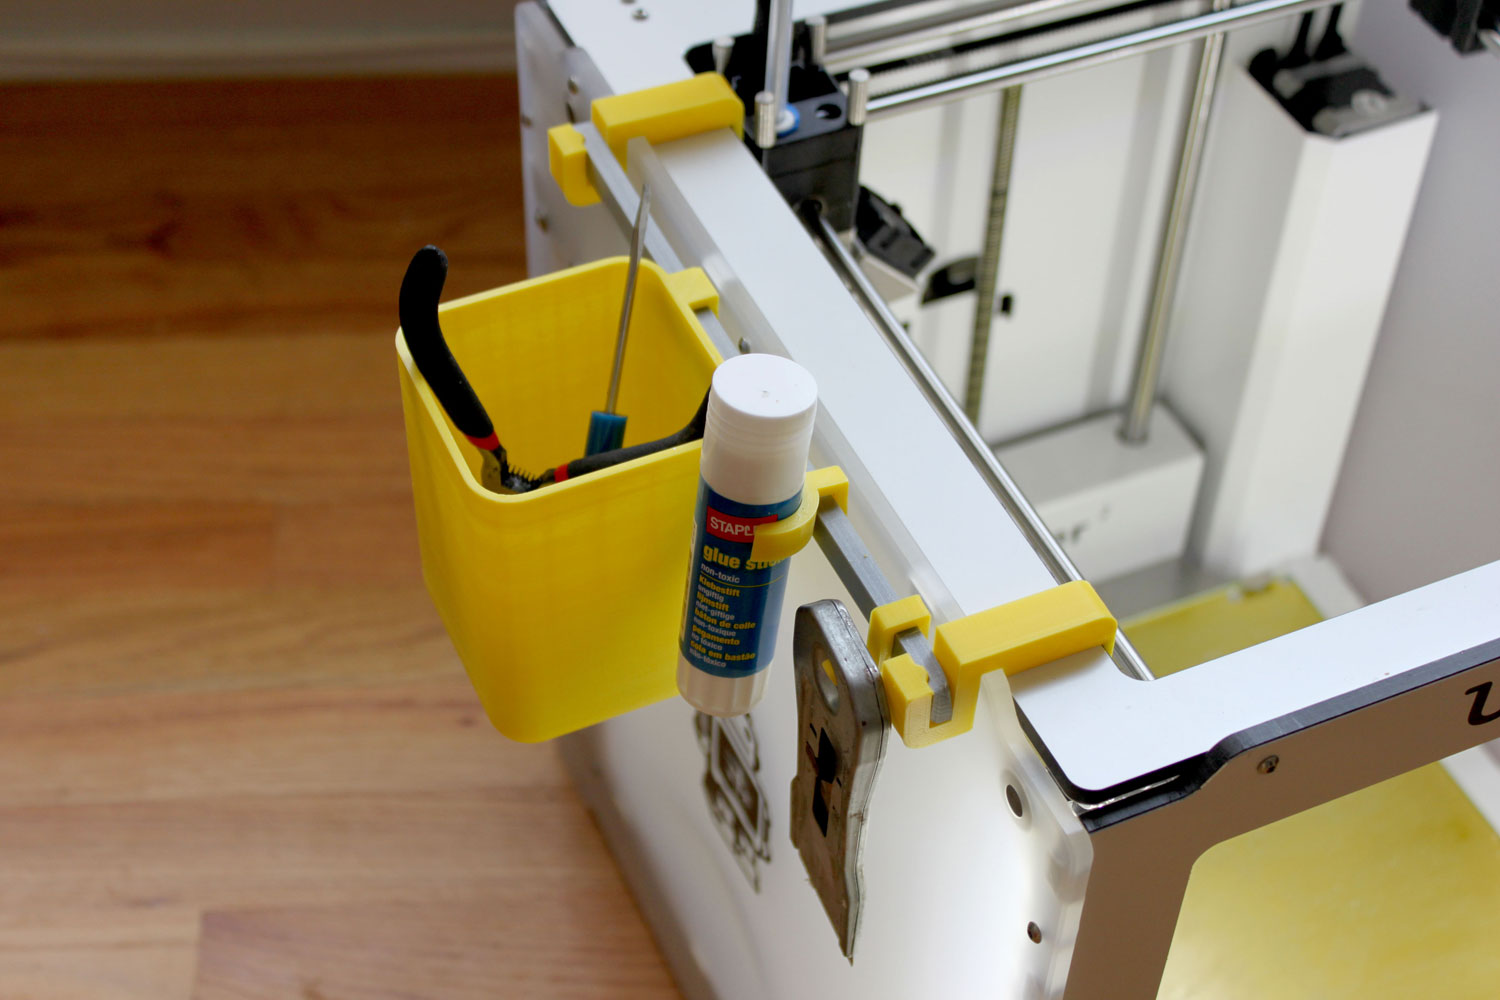
These files have also helped me easily create printed modifications, tools, and add-ons for the product, like this customizable tool shelf I designed.
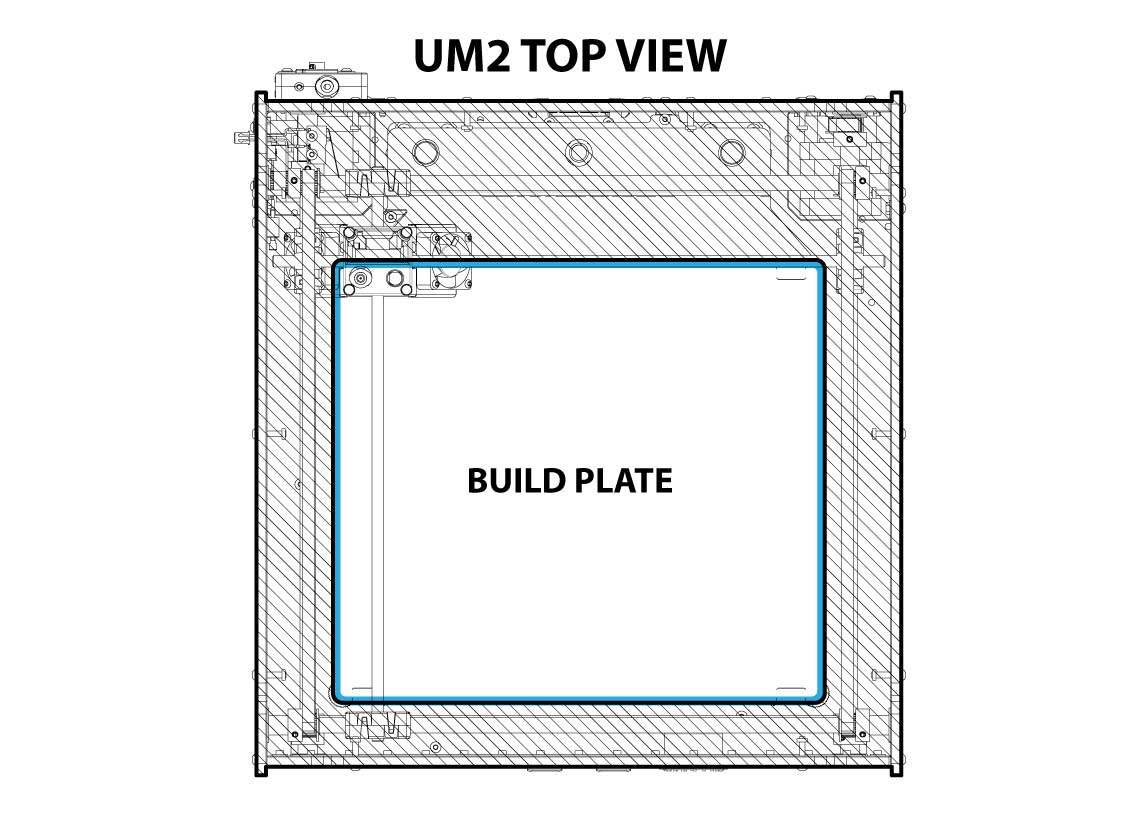
You can also use the cad data to illustrate ideas. All of the linework in this post was data exported from Solidworks and made in Adobe Illustrator. The linework above shows and exploded view of the rear-mounted “Bowden” feeder mechanism.
Build platform – One of the big problems I had with the Makerbot was the edge of the parts curling up, especially when the part was long and thin. In fact, the only way to reduce this warping was to build a custom laser cut enclosure around the printer, to keep a more consistent temperature in the build area. The build platform of the Ultimaker 2 is heated and I have not had issues with any prints curling up: long thin parts, large flat parts, I don’t ever need to print with a raft. The buildplate is made from plate glass, so it is easy to remove parts without worrying about scratching, and It is easy to wash off.
Space-conscious design – The the outer perimeter of the ultimaker 2’s footprint is much closer to the build platform than most 3d printers. This was important for me since I live in a small apartment.
Slicing Software – Cura is the native slicing software used for the Ultimaker 2 to create tool paths for printing from an stl file. It is released by Ultimaker, however it is a popular slicer used for a variety of printers. You can set up a print quickly, or use in-depth settings, and it has a print one at a time mode, which eliminates wasted time from the toolhead moving from part to part on the build tray. The software even shows you where problematic overhangs are occurring.
Issues
I would recommend this printer to anyone who has the cash and is looking for a low maintenance, high quality printer. It does have some drawbacks however.
No dual extrusion upgrade – Ultimaker has announced that they have abandoned plans to develop a dual extruder for the Ultimaker 2 in their January 26th, 2015 company update. It states that they cannot incorporate a reliable dual extruder without extensive modifications and they plan to implement dual extrusion on future models.
Other – From my experience, I have found overhangs to come out a bit rough looking: bridged and un-bridged. A bit of tweaking of print head speed resolves this. My only other gripe is that the build plate is a little difficult to remove, but that isn’t a big issue.